Localize Resource Center Content
Overview
Userpilot's translation service gives you the full ability to translate Resource Center content in different languages. You can provide on-demand help for your users in the right language for them. This can be easily done with a click of a button.
Common use cases
- Non-English speakers can now add their Resource Center modules more easily.
- The ability to target a global audience by delivering the same content in multiple languages.
Setup your language localization parameter
To accurately localize your Resource Center, Userpilot determines which language to show to your end-users based on the language localization parameter. This parameter can be changed from the Localization tab under your account settings.
You can use a property sent to Userpilot via your installation as your localization parameter taking into consideration that the name of the user propertry must be 'locale_code' and any used language should follow the ISO 639-1 code standards as shown in the example below. If you're not passing any properties, you can use the default property 'Browser_Language' which is automatically tracked by Userpilot. This parameter will look at the default language setting that your end-user sets up for their browser.

Types of localization
To start localizing your Resource Center content after choosing your desired localization parameter, you can click on the localization tab in the Resource Center settings, then click on the language that you would like to translate content to, and select the desired method of translation.
- Automated – choosing the desired language(s) and we'll automatically translate the content using our state-of-the-art AI-powered language translation service.
- Manual – exporting the content as a CSV or XLIFF file, sending it over for your localization team for translation, and then importing it back to Userpilot.
Important note: The translated content cannot be retrieved once you change the translation method from Automated to Manual and vice versa.
Step by step localization guide
Pro tip: We recommend localizing your content only after it is fully built, designed, and tested.
Automated
- Create your content in your desired language since it will be considered the base for translation, then head over to the localization tab and select the language you want your content to translated to.
- You can click on the "Auto-Translate" button to auto translate all the content in the Resource Center. You can also auto-translate each field individually by clicking on the translation icon that appears in the test field.

Important note: Enabling the option "Override fields already translated" will override any fields that you translated when editing individual text fields.

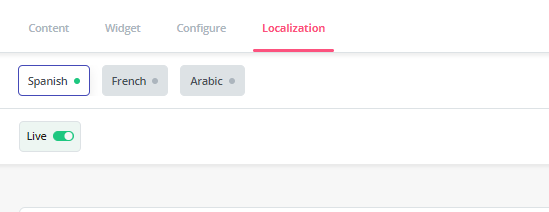
- Once you are confident that your content looks fine, just toggle the "Live" option and a green indicator should appear for that specific language.
- Publish the changes and you're all set!
Note:If the Resource Center is unpublished you will see a "Publish" button. In case the Resource Center is published, you will see a "Publish Updates" button.


Manual
- Before enabling manual localization mode, make sure that you fully built your content in your desired language localization mode.
- Click on the export button to download the CSV or XLIFF file. The file for each of the languages will contain the content as strings.

- Here is how your exported file will look like:

- Enter the translation of each row into the 'Target' column

- Be sure to save your file as CSV UTF-8 (Comma delimited) when you have finished translation to your desired language.
- Once you are confident that your content looks fine, just toggle the "Live" option and a green indicator should appear for that specific language.
- Publish the changes and you're all set!
Note:If the Resource Center is unpublished you will see a "Publish" button. In case the Resource Center is published, you will see a "Publish Updates" button.


